I built a running machine and tested it in Kenya.
As a swimmer turned sprinter, I wanted to measure the thing I cared about: how fast an athlete moved, where they accelerated and when they slowed down. Professional systems existed. They were far outside my budget.
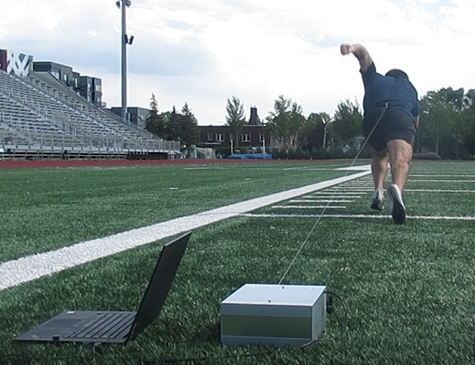
- Kenya: Tested with elite sprinting talent
- 18+: Sprint metrics explored
- Built: Electronics, mechanics, and software
Video loads only after you press play.
- The problem: Professional sprint-measurement systems cost around $20,000. I wanted to learn whether I could build one myself.
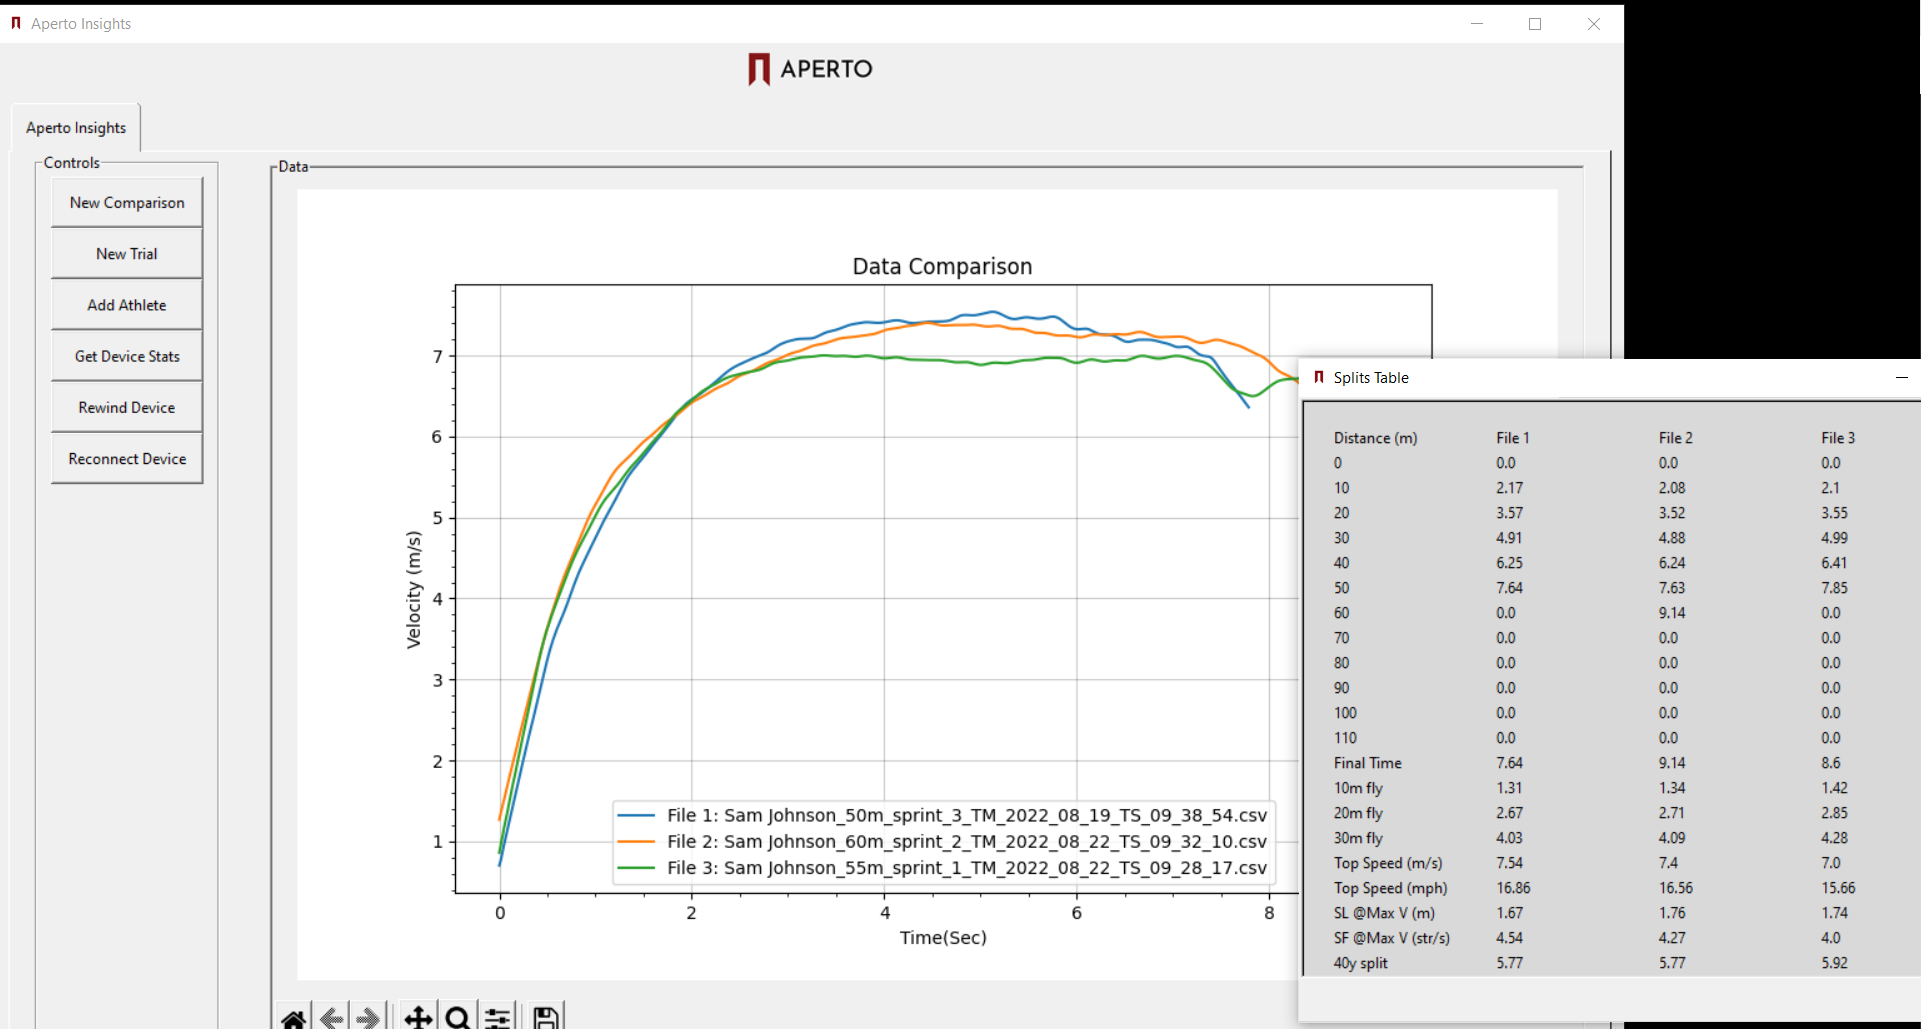
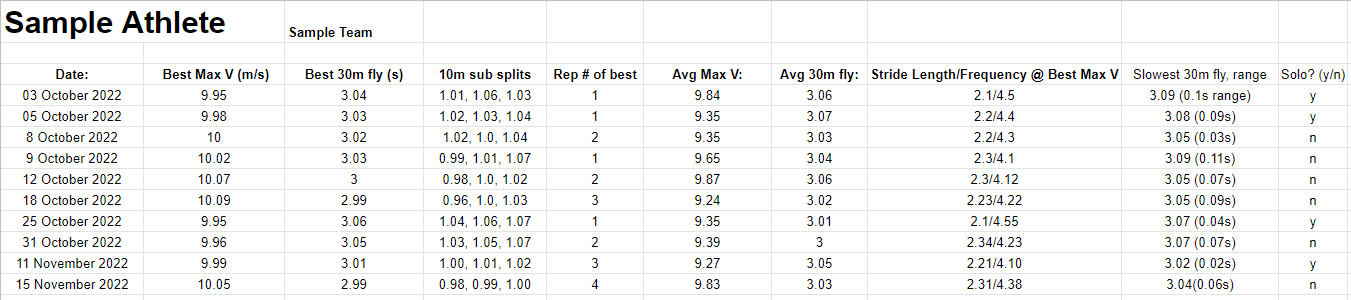
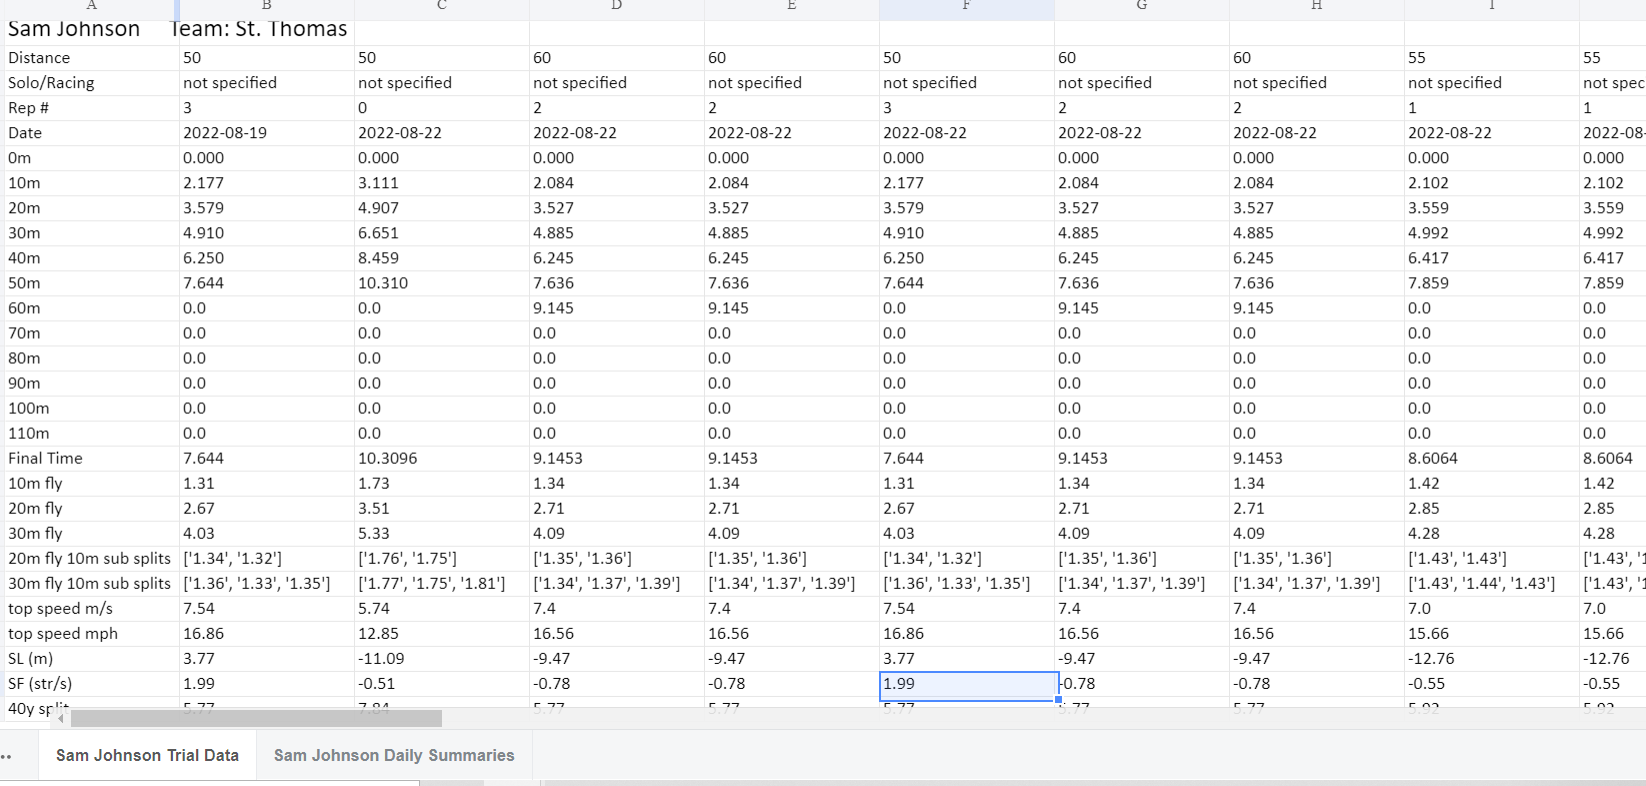
- The device: A tether, encoder, motor, microcontroller and Python app produced speed graphs and split measurements.
- The failures: Printed shafts and couplings failed under load, forcing stronger parts and better mechanical choices.
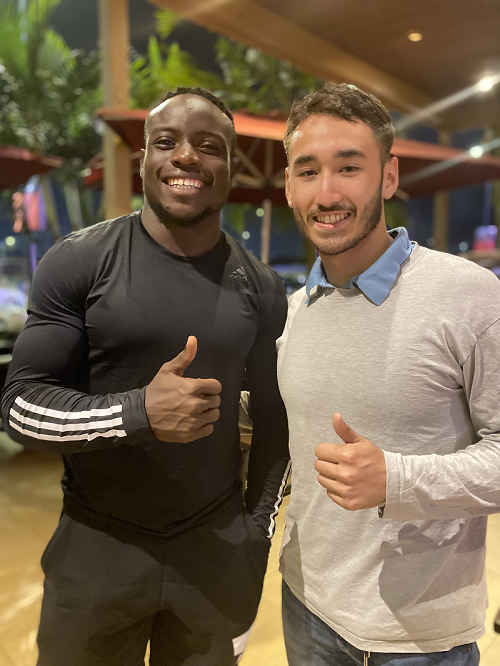
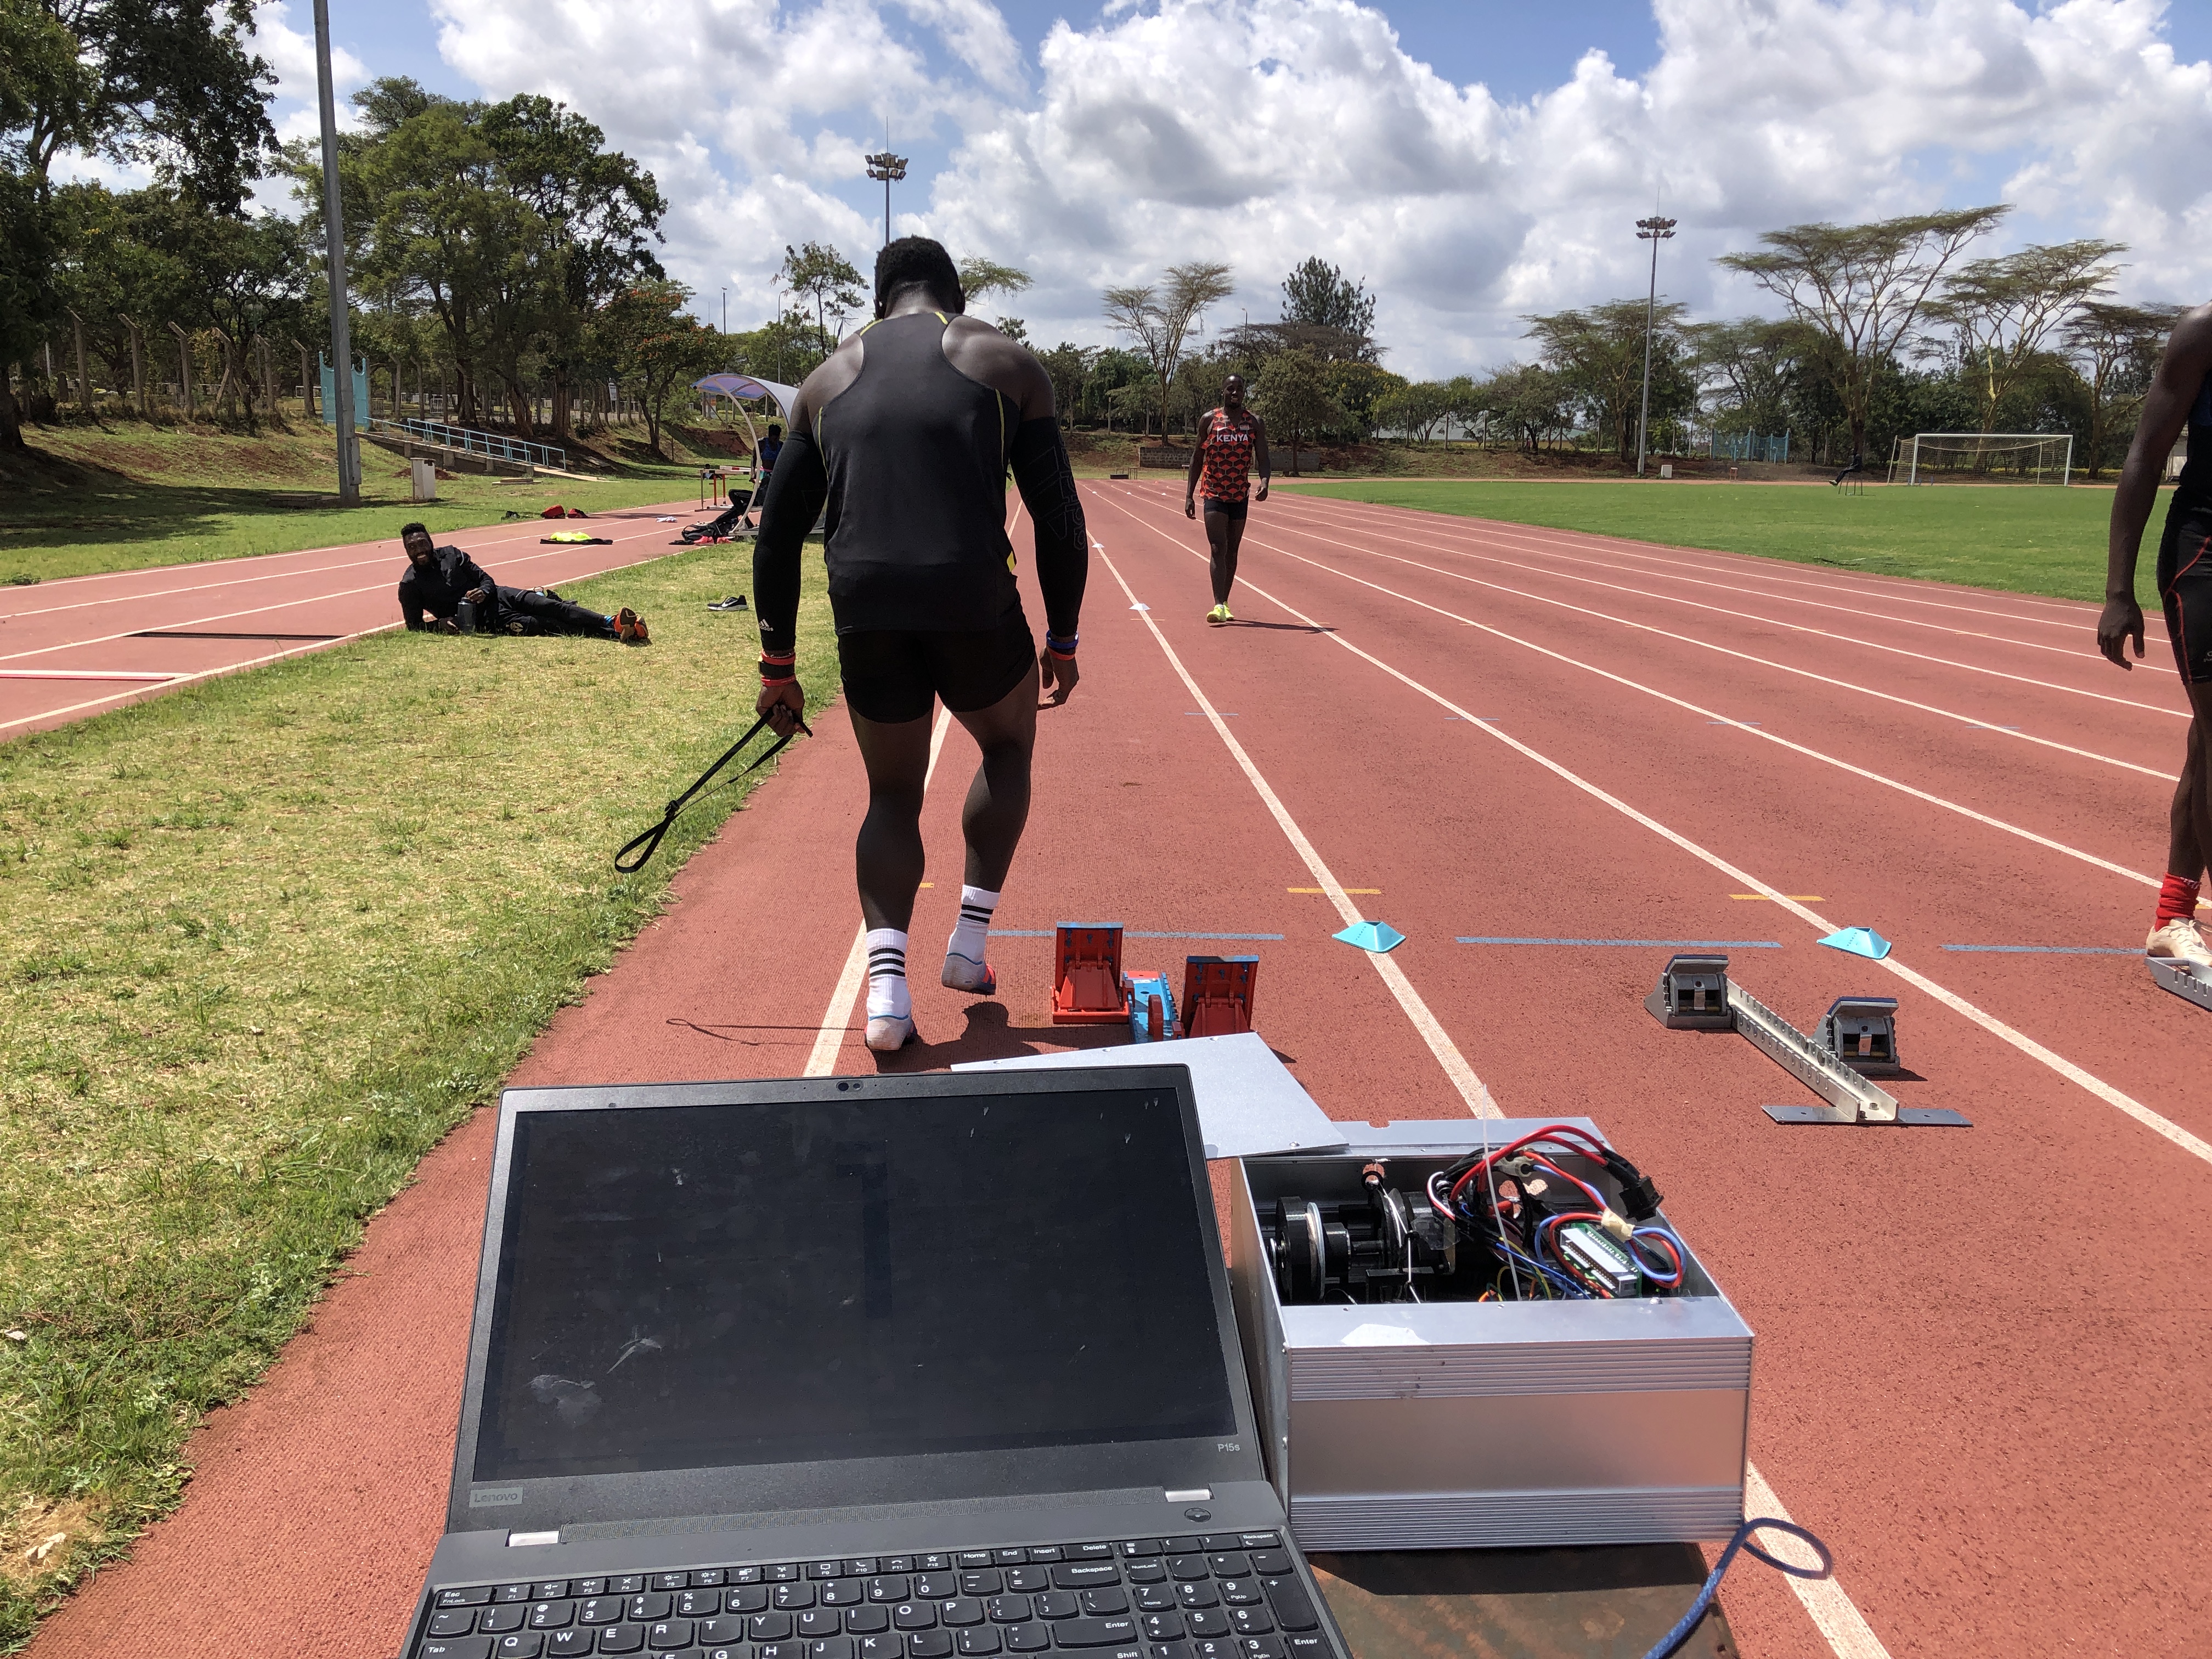
- Real-world proof: I took the prototype to Nairobi to test with Ferdinand Omanyala, then gathered more feedback in Eugene and Oberlin.
- Cost lesson: I reused off-the-shelf components, but rework and travel added up. I never documented a reliable final parts total.
- Biggest takeaway: The data had to answer an athlete or coach’s question—not just demonstrate clever engineering.
Read the full build logExpand ↓
Why I couldn't leave the idea alone
- I found a commercial resisted-sprint training system and understood why professional teams paid for it. But it wasn't remotely affordable for a person experimenting with sprint training. I wanted to see whether I could build a smaller, accessible way to capture useful speed data.
- I started Aperto and worked across the entire experience myself: mechanical prototyping, electronics, embedded code, desktop software and actual field sessions.
Lesson: An expensive existing solution can be a useful starting question, even when you can't build the whole business around it.
From motion to numbers an athlete could use
- The prototype used a line that an athlete pulled while running. A sensor measured how the line moved; I translated that motion into timing and sprint statistics. The device was more than a mechanism: I also built a software interface to record, visualize and compare attempts.
- The challenge was connecting systems that behaved differently: the mechanics needed to run smoothly, the electronics needed clean enough measurements, and the interface needed to make the results understandable to coaches.
Lesson: Building the device is only part of making the information useful.
Prototype failures forced better decisions
- Some early printed components weren't strong or reliable enough for repeated use. I rebuilt mechanical assemblies, improved how motion was handled, and wrote tools to examine and calibrate the output.
- Looking back, I moved into fabrication before fully comparing enough component alternatives. A more deliberate system-level comparison would have saved time and money, even if the rough prototypes helped keep me motivated.
Lesson: Prototype quickly, but write down the trade-offs before you commit to the next version.
The trip to Kenya
- I shared an early prototype publicly. That led to an invitation to Nairobi, where I demonstrated the device and collected feedback from Ferdinand Omanyala and people around his training environment. I paid my own way and went because an opportunity to test with world-class athletes was worth more to me than another week of guessing at home.
- I also traveled to the 2022 Track and Field World Championships in Eugene to talk with coaches and later tested updated hardware and software at Oberlin College with a coach I'd met in Oregon.
Lesson: The best feedback often comes from bringing a real, imperfect thing to the people who might use it.
Why I stopped—and what it taught me
- This was an ambitious solo hardware business, not a finished commercial launch. Development consumed real money, space and time. Eventually I ran out of enough of those resources to keep pursuing it and stopped working on it actively.
- I also realized I had been explaining how clever the machine was instead of quickly explaining why the measurements would matter to a coach. Now I'd start with one athlete's decision the data helps improve, then prove that result before expanding the feature set.
Lesson: Technical achievement doesn't automatically establish demand. Make the benefit understandable before making the product more elaborate.
What actually went into the machine
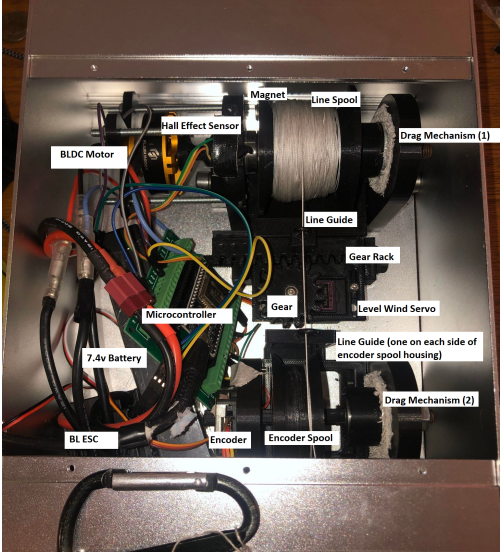
- The mechanical prototype included a line spool, an independently measured encoder spool, and a level-wind mechanism. A brushless motor helped manage line behavior; a servo-driven rack and pinion moved the level-wind guide as the line returned. I 3D printed many parts and integrated them in an aluminum project enclosure.
- An ESP32 gathered encoder and sensor readings; a Python application received trial data, cleaned it, made charts and organized athletes. Rather than insist on a seamless, live stream, I also explored collecting measurements during the run and transferring the data afterward. That reduced bottlenecks in the embedded workflow.
- In the original public build log I also described shaft and motor-coupling torsion failures, transitioning to aluminum shafts and stronger one-piece geometries after repeatedly learning the limits of early printed assemblies.
Lesson: Choose components around the whole workflow: mechanics, data, power and operator experience have to work together.
Cost and budget: the part I wish I had tracked better
- I compared the project to a commercial sprint system listed around $20,000 at the time. That was the price of the product I was reacting to—not the cost of my prototype.
- My own build involved a purchased motor/controller, encoder, servo, ESP32, electronics, aluminum enclosure, printed mechanical parts, batteries and line, plus prototype revisions and travel for user testing. I do not have an itemized, verified historical bill of materials ready to publish, so I am not assigning made-up dollar totals to those parts.
- The inexpensive early decision was to reuse off-the-shelf electronics and rapidly printed parts. The expensive decisions were repeated rework, ambiguous component choices, and trips to gather feedback. If I repeated the project, I would separate minimum viable hardware cost, iteration cost and validation/travel cost from day one.
Lesson: An accurate cost breakdown is useful only if you distinguish purchased parts, existing tools, rework and travel.